Packit Upstream Onboarding Guide
Let's take a look on how to start using Packit if you are an upstream maintainer and how to get the most out of it.
If you are a downstream package maintainer and would like to see the information on how to onboard to using Packit in dist-git, see dist-git onboarding guide directly.
This guide is focused on the service use-case, but Packit is also available as a CLI tool,
so you can always try things locally on your own.
Note that running tests in Testing farm infrastructure is not currently supported with the CLI tool.
Unlike the service, CLI uses your own identities when connecting to other service like Copr
or Fedora dist-git.
Packit CLI is NOT a client of the Packit GitHub app, packit command directly interacts with the services.
Table of contents
Setup
To start using Packit, you need to do three things:
- set up integration (so Packit is notified about your activities and can provide feedback)
- be approved (self-done mapping of your forge identity to FAS identity, so we know who you are)
- configure the wanted features
1. Set up Packit integration
The integration is dependent on the service the upstream project is hosted on. In case you want to use Packit on your downstream repository for downstream jobs (Koji build and Bodhi update), you don't need to enable anything. Just place your config file into the dist-git repository.
Here are the supported git-forges:
GitHub
The majority of Packit users host their projects on GitHub, therefore we focus mainly on supporting the GitHub App. All of our workflows are supported and tested on GitHub. We utilize the majority of new GitHub features that can be used in GitHub Apps.
How to set up Packit on GitHub
- Navigate to the "Packit-as-a-Service" GitHub
application.
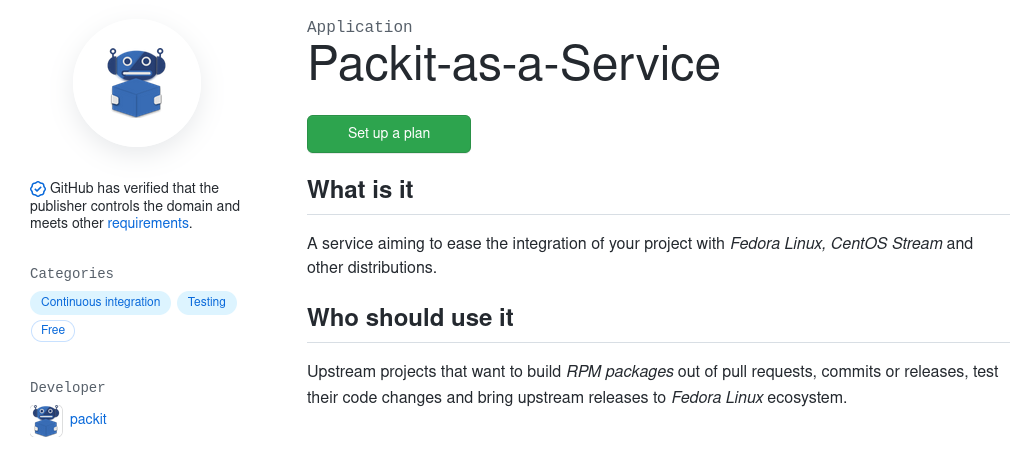
- Under "Pricing and setup", click "Install it for free".
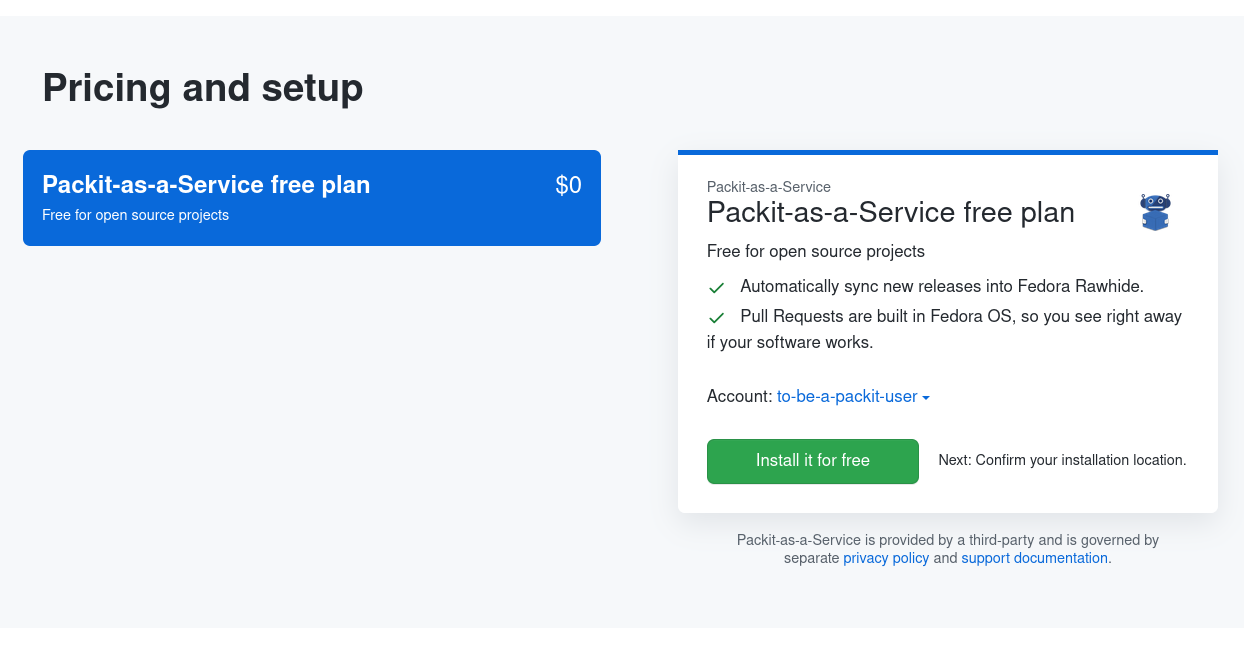
- Click "Complete order and begin installation".

- Install the "Packit-as-a-Service" to repositories of your choice.
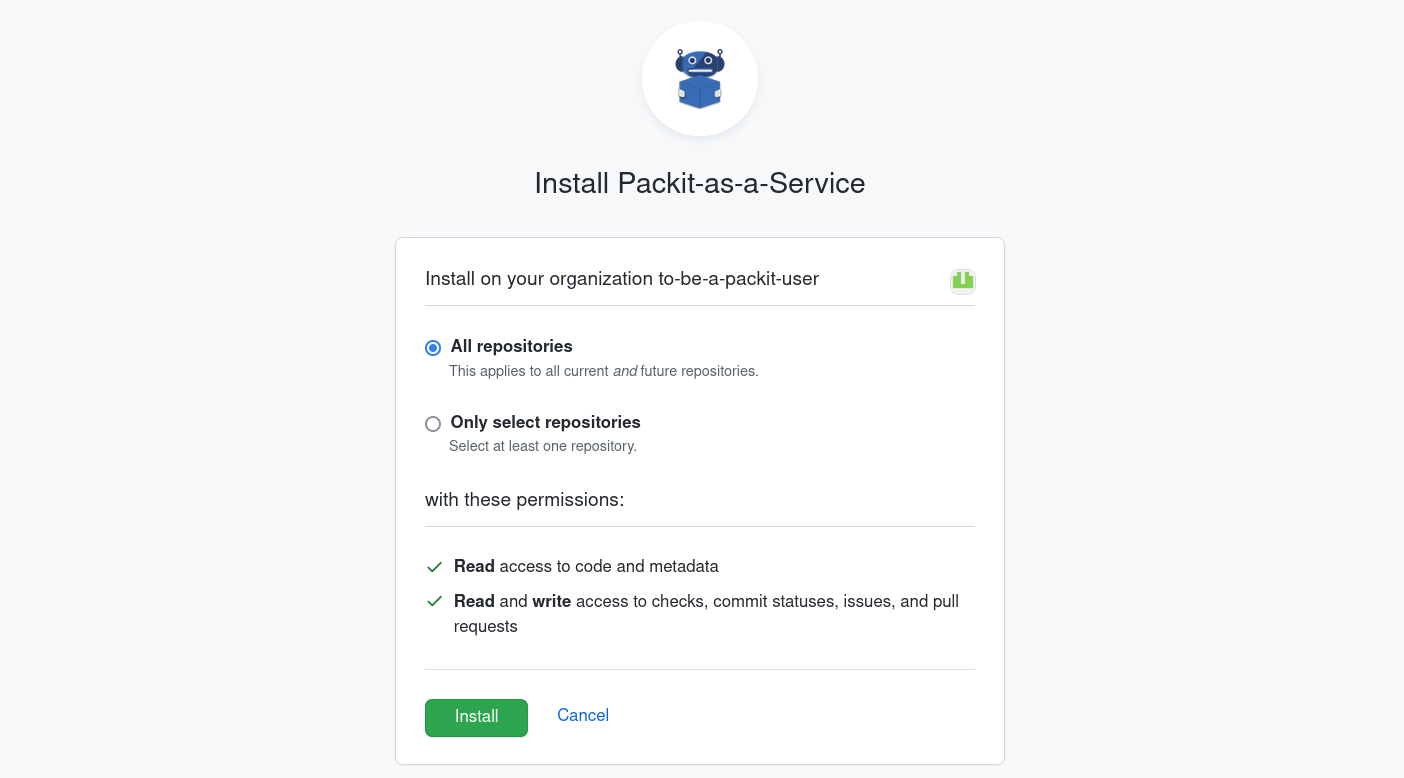
Once installed, you will see the "Packit-as-a-Service" GitHub application in your project settings. In the left sidebar, click "Integration & services" and you will see the application displayed there.
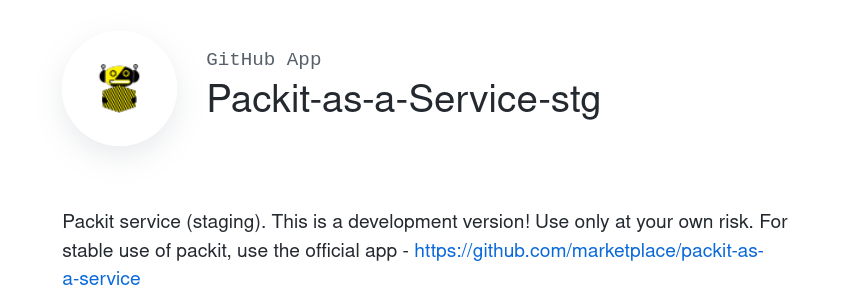
Staging instance
Packit-as-a-Service-stg GitHub App runs the latest code. It can be used to verify the latest changes until they get (every Tuesday) into the production instance.
Few points to consider:
- You might want to install both applications together to not disrupt your current workflow.
- Both applications use the same config file, but you can (and have to) use
packit_instancesconfiguration key to specify (globally or per job) which instance handles your jobs -- you can useprod,stgor both. - Staging application has fewer resources and can be a bit slower in responses.
- Picking just one instance is required only for
koji_buildandbodhi_updatejobs since both instances work with the production instances of Fedora systems. - You will have twice the number of commit statuses for your PRs if you configure both instances.
- Please, let us know when something looks weird or does not work with the staging app.
- You are helping us be sure that we don't break your use-case.
Technicalities:
- Staging application uses the code from
mainbranches of packit-service, packit and ogr.- The rebuild is done for each push to
mainbranch inpackit-serviceand re-deployment is done automatically after few minutes.
- The rebuild is done for each push to
- Production application uses
stablebranches ofpackit-serviceandpackit.- It is rebuilt on Monday and deployed on Tuesday morning.
Now, if you want to enjoy the freshest features and help us with the development, install the app here. Thank you in advance!
GitLab
GitLab support is mainly experimental and is influenced by the presence of CentOS Stream source-git workflow. We do not verify the functionality of the GitLab support on a day-to-day basis as we do with the GitHub App. Most of the code is forge-independent so you can use the very same functionality both on GitHub and GitLab. The only difference is the setup and small UI differences because of the limits of the specific forge. You can use Packit on any GitLab instance, if:
- The GitLab instance is publically available.
- Packit has an identity for that instance.
(Currently only
gitlab.com,gitlab.freedesktop.org,salsa.debian.organdgitlab.gnome.org, but let us know if you need any other instance to be supported.)
How to set up Packit on GitLab
GitLab doesn't have an app functionality, and we don't use the Integrations as it doesn't solve authentication. To enable Packit, you need to manually configure a webhook.
- Go to
Settings → Webhooksand add https://prod.packit.dev/api/webhooks/gitlab or https://stg.packit.dev/api/webhooks/gitlab as theURL.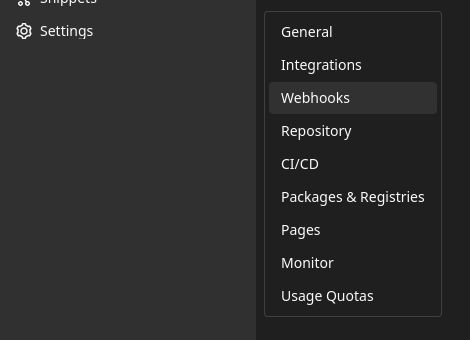
- Select
Push events,Comments,Issues events,Merge request eventsandRelease eventsas theTriggers. Do not provideSecret tokenyet and clickAdd webhook. You should see the created hook at the bottom of the page now.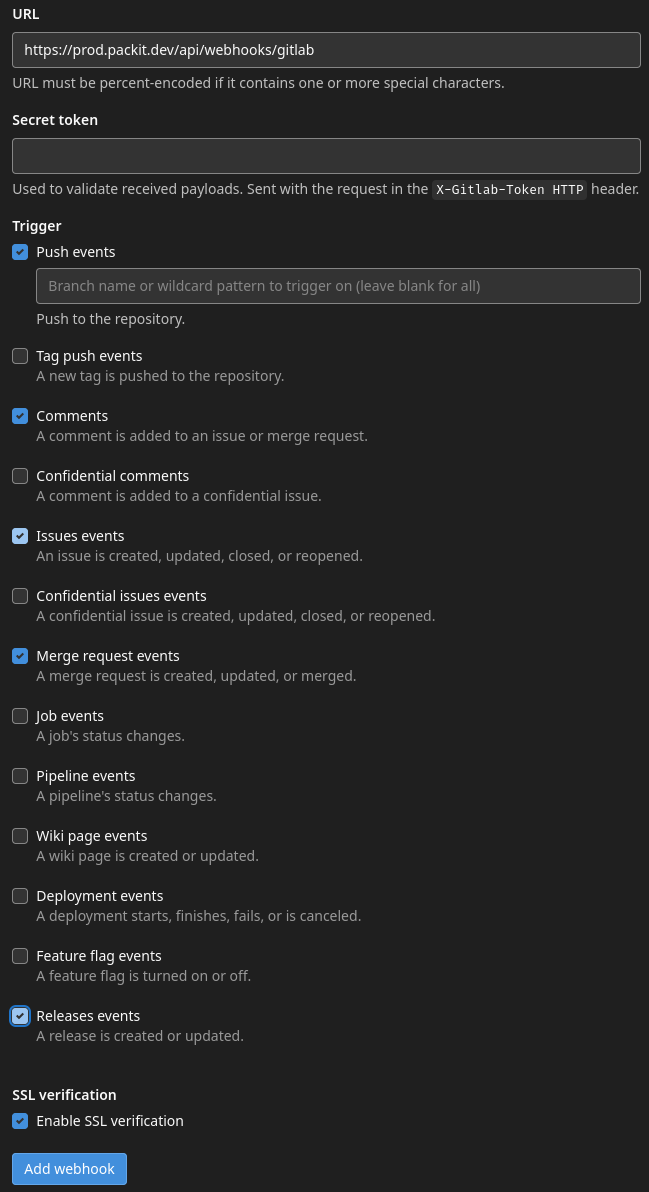
- Select
Testand for examplePush event. At the top of the page appears a redHook executed successfully but returned HTTP 401 "X-Gitlab-Token not in request.headers". - Wait a bit and check
Issuesof the project and after a while there should be a new confidentialPackit-Service Authenticationissue with the instructions how to finish the setup (most notably adding the token to webhooks).
Packit requires Developer permissions to the project to be able to set the commit statuses. Same applies to the forks.
If you do not wish to set the permissions, Packit fallbacks to reporting the statuses via comments which doesn't have the best UX on GitLab.
GitLab Pipelines
With some limitations (but tweakability) you can also use Packit as a GitLab pipeline
using the Packit's CLI from the regularly built
quay.io/packit/packit image.
As you can see in the following example, it's really straightforward and explicit:
image: quay.io/packit/packit

srpm_build:
  stage: build
  script:
  - packit srpm
  artifacts:
    paths:
      - "*.src.rpm"
    expire_in: 1 week
Pagure
We have rudimentary support for the Pagure instances since they are used in the downstream workflow. Packit cannot be set up as a CI (in the same sense as on GitHub or GitLab) on Pagure instances, since the demand for this feature is not significant. The differences between GitHub/GitLab and Pagure APIs would result in many workarounds having to be implemented, if it would be possible at all. You can track the progress in the related issue on GitHub.
2. Approval
As a next step, you need to have a valid Fedora Account System
account to be able to start using Packit Service in an upstream project.
For GitHub, we have an automated way of self-approval,
for other instances, contact us, and we will approve you manually.
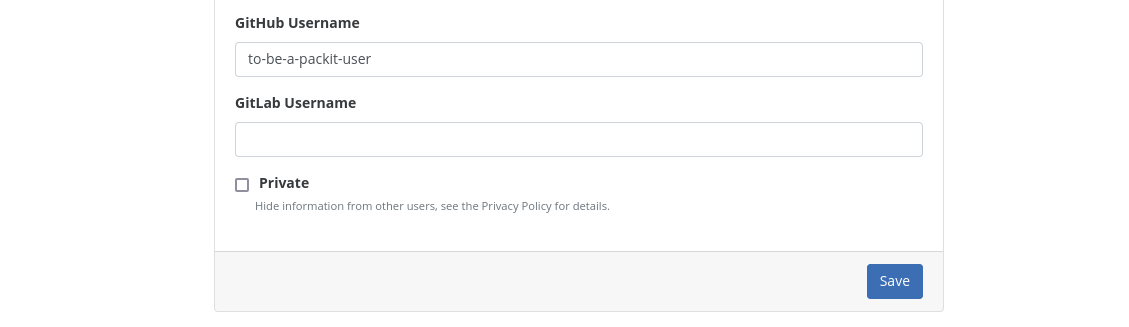
We require our new users to have GitHub Username field set in the FAS account so that we can automatically
check for the match between the GitHub Username field in the FAS account and the GitHub account that triggers the verification.
(If you don't know, where to set this value,
the URL looks like this: https://accounts.fedoraproject.org/user/<my-fas-username>/settings/profile/#github.)
During the installation, we try to check the FAS account with the same username as the GitHub account that triggers the installation and if the check fails, we create a new issue in our allowlist tracker. (You will be tagged in that issue and should get a GitHub notification about that.)
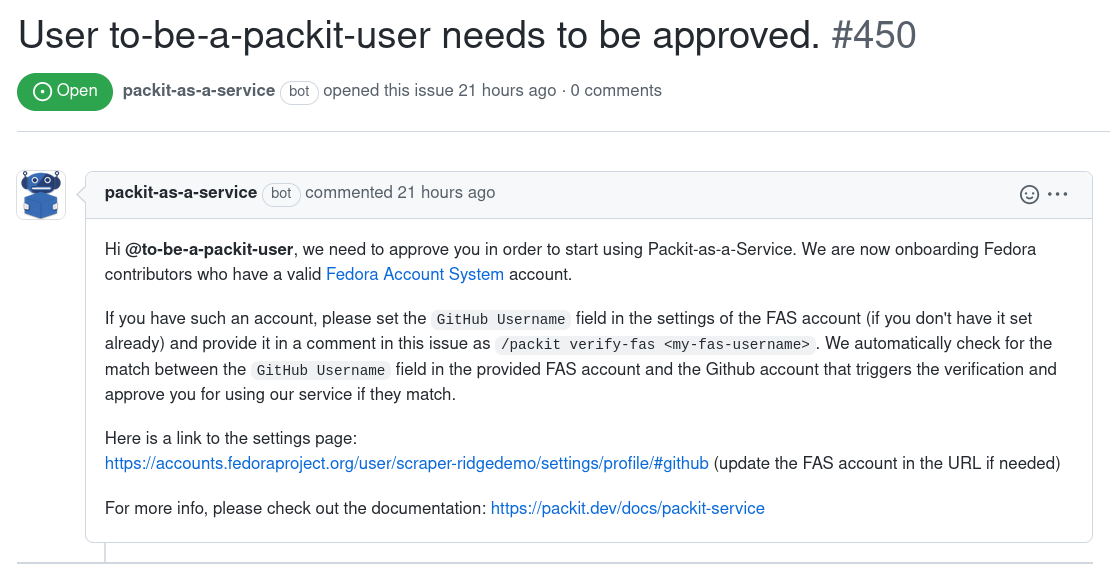
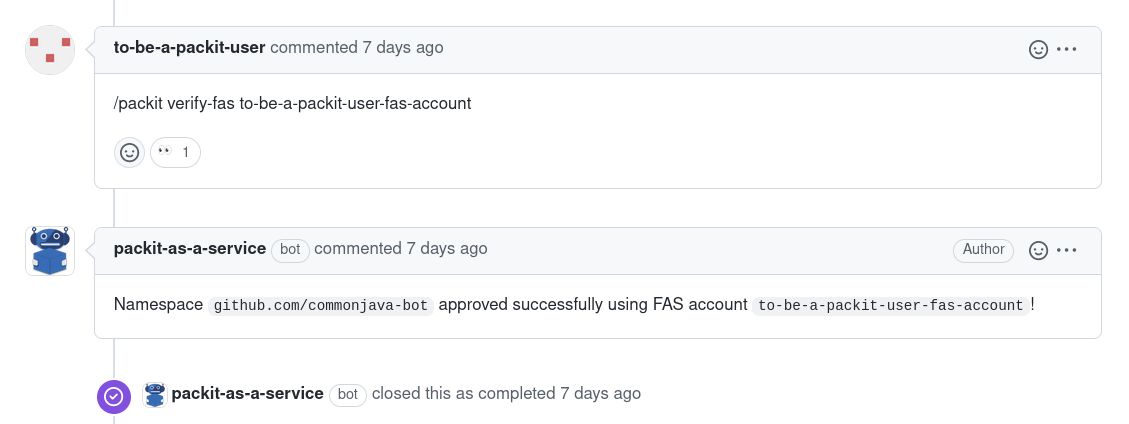
You can provide the FAS account in a comment
as /packit verify-fas <my-fas-username> in the issue we create
for your installation. This will trigger the automatic check.
Until that, you will get a neutral status with Namespace is not allowed!
message on your commits.
Besides that:
- If you want to configure builds via Packit, your software needs to comply with Copr guidelines since we use Fedora Copr for the builds. Therefore, please, make sure you read them before configuring the Packit build job.
- If you are interested in using internal instance of the Testing Farm to run your tests in, please, reach out to us, since for this job, an additional approval on our side is needed.
- For retrying the build and test jobs via
/packit buildand/packit testpull request comments, you need to have write access to the repository or be the author of the pull request. - Similarly, for retrying the propose downstream job via
/packit propose-downstreamissue comment, you need to have write access to the repository.
3. Configuration
Packit uses a configuration file to let Packit know what to do, when to do it and how. As a format, it uses YAML and here are all the valid names:
.packit.yaml.packit.ymlpackit.yamlpackit.yml
And where do you need to place this config file? Whenever you need to use Packit -- the concept is easy: For upstream jobs, Packit loads the config file from the repository and commit related to the event it reacts to. E.g. if Packit reacts to a pull request, it takes config from the HEAD commit of the pull request, if Packit works with releases, the release commit is used.
For downstream jobs, Packit always loads the config from the default branch of the dist-git repository
(usually rawhide).
For validation of the configuration, you can utilise
Packit CLI command config validate or our
pre-commit hooks.
You know how to call this file, where to put it, but what should you fill inside?
In the following parts, we will cover some basic concepts used in the Packit config file. More details can be found on a dedicated configuration page.
Basic configuration
You need to provide some basic information to let Packit understand your project and package.
You can use packit init command (when running Packit locally) to get a basic structure.
It will look like this (name of the package is guessed from the directory name):
# See the documentation for more information:
# https://packit.dev/docs/configuration/

specfile_path: package.spec

# add or remove files that should be synced
files_to_sync:
    - package.spec
    - .packit.yaml

# name in upstream package repository/registry (e.g. in PyPI)
upstream_package_name: package
# downstream (Fedora) RPM package name
downstream_package_name: package
We know that every project is a bit different and Packit can't guess everything so you can (re)define various other options. The full list can be found here.
Version handling
There are a few version-related config options you might need to set:
upstream_tag_template: Specifies a format of upstream tags if it doesn't contain just a version.get-current-versionaction: Command to get a project version in the current state of the project.release_suffix: Used to influence release field of artifacts provided by Packit.update_release: Whether to modify release when creating SRPM.
Jobs
Packit's feature set is really wide and does not need to be used as a whole pipeline.
To let user decide what and when should run, Packit uses concept of so-called jobs.
Each job represents a feature of Packit. All the jobs are defined under the jobs key.
For each job you need to specify the following information:
job: the type of the job, the feature you want Packit to do.trigger: when the job is run (pull_request,commit,release, orignore).- additional information needed for the job (like what targets to build, for what branch to run the job,...)
(Note that for each job, not all the triggers are supported.)
As an example you can take a look at the following config snippet
(these are also the default jobs used if you don't set the jobs key):
jobs:
- job: copr_build
  trigger: pull_request
  targets: [fedora-stable]

- job: tests
  trigger: pull_request
  targets: [fedora-stable]

- job: propose_downstream
  trigger: release
  dist_git_branches:
    - fedora-all
Most of the attributes can be defined both on global level (outside the jobs key)
or for a single job only (like e.g. targets in the snippet above).
More about this overriding mechanism can be found here.
Another useful feature are aliases used to avoid
hardcoded values that changes when there is a new distribution release.
Available jobs
copr_build: An RPM build triggered for pull-requests, new branch commits or releases. (Can be used to verify that package is buildable, to easily install package including the proposed change or to provide long-term Copr repositories.)tests: Test suit using TMT/FMF definition run in the Testing Farm (Can be used as a next step to Copr build or without build at all.)upstream_koji_build: A scratch Koji build triggered for the upstream state of project.propose_downstream: For upstream release, Packit prepares a Fedora release. (Source is saved to the Lookaside Cache and a dist-git pull-request is created for each configured branch.)koji_build: A downstream Koji build triggered when there is a new dist-git commit in a given branch.bodhi_update: A Bodhi update created for a successfully finished Koji build.
More about the jobs and how to tweak them can be found on a configuration page.
Actions
Actions are a way how to redefine or tweak the Packit's workflows. These are user-defined commands that can replace a part of Packit's job (e.g. to get version, or to create a tarball) or are run in a particular step as a hook (with no action run by default).
Take a look at the tables here to know what actions are available for each job.
Users
Packit checks if the user has sufficient permissions to complete a job (this depends on the job type). For this reason the profile of a Packit user has to be accessible. For example, on Github this means that the membership of a user to their team has to be public (see https://github.com/orgs/[org_name]/people/[user_name] ).
How to try that for real
In order to start using Packit, we suggest you install the tooling locally. All
the logic is baked inside the packit command - so once packit srpm (the command
to create a source RPM locally from the current snapshot of the project) starts
passing for you, it should work inside packit service as well.
RPM builds pass on your laptop
If you are new to RPM packaging you should visit this guide.
Packit needs an RPM spec file to build your package. The spec file does not need to be included in the upstream repo and can be generated on the fly or downloaded (e.g. from Fedora dist-git). Please check out our FAQ to read about some other common questions.
You can also read more about the SRPM process
in the document dedicated to the srpm command.
Running from the dist-git repository
When you are not allowed or do not want to run packit command from the upstream git repository, you can run commands from the cloned dist-git repository in the same way as you do from upstream.
Is your packit srpm finally passing? If not, feel free to reach out to us.
If yes, let's proceed to the next level.
The project has successful builds inside the service
If a SRPM can be created locally, all should be good in the service as well.
That's the theory. In practice, your laptop and packit service
environment are vastly different. In the service you can specify
the requirements with the
srpm_build_deps option.
In any case, feel free to reach out to us
if you are having troubles, and we'd be glad to help.
As described above, Packit supports various functions in form of jobs you can configure.
Let's try the most favourite one: Copr build.
In order to get RPM builds for every change in your project, you need to add a
section jobs inside your .packit.yaml and set up a copr_build job to do RPM builds for
every change in a PR:
jobs:
- job: copr_build
  trigger: pull_request
  targets:
  - fedora-all
fedora-all stands for all currently available Fedora releases.
Jobs are nicely described over here.
If you are looking for an inspiration for your .packit.yaml, check packit's config file since we try to use all the latest features.
Check that Packit works
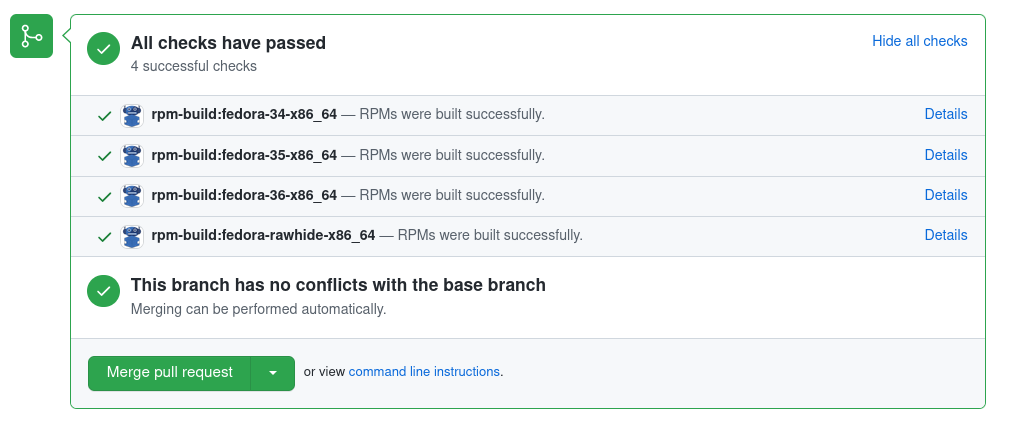
With the configuration above, Packit will build your changes and provide them as RPMs. Once you create a pull request, Packit will:
- Check out the PR.
- Merge it to the target branch (this can be configured by the
merge_pr_in_ciconfiguration option). - Submit a build using the code that results from the merge in the Copr build system in Packit's namespace.
- Report results about the Copr build status to the pull request.
An example of Packit's checks in a pull request:
Retriggering
You can find all the information on retriggering here.
And that's about it. Now you should be able to use the core features of the Packit. If you have any questions, feel free to reach out to us.
We welcome all kinds of suggestions to this guide, feel free to open a new issue here.